Happy Halloween!

I found this scary lookin' paper at Michael's last weekend. I thought it would work great with my Nestabilities. I'd been wanting to try my scalloped circles to make this card shape for something different. This is my last Halloween project..... until next year! Have a Happy Halloween!
Recipe:
Paper: old olive, black, pumpkin pie, patterned paper
Other: scalloped circle Nestabilities, ribbon, eyelets.

Turkey Time

I love these guys! After seeing them, I new I had to make some. There's a tutorial at http://tracigentry.typepad.com/inkin_up_the_dog/. I love using punches, there are just so many fun things you can do with them. I can't believe all the ideas people come up with. It's amazing. Anyway, tomorrow is Halloween and before you know it it will be turkey time. That's why I'm starting to get a few Thanksgiving cards ready to send out to family. I've also started making 6x6 recipe cards with some of my favorites that I will be making for my Thanksgiving Day meal. I'll be posting them soon!


  • Recipe:

  • Paper: Old Olive, chocolate chip, white, pumpkin pie, black, ruby red, more mustard, Bella Rose

  • Ink: chocolate chip
  • Stamps: Studio g

  • Other: old olive ribbon, SU clip, scallop circle, circles, and flower punches

Cheers

I've been having fun playing with the dollar stamps I bought at Michaels last summer. When I saw the new designer Haiku paper I thought it would work great for this set. The colors are more vibrant than the photo actually shows, though. With the snow and cold this week, this card just makes me wish for warm sunny days sitting on the deck relaxing. I don't think I'm ready for winter, but I guess I have no choice!
  • Recipe:
  • Paper: Haiku designer paper, tangerine tango, kiwi kiss, white, Blush Blossom
  • Ink: black stazon
  • Other: Kiwi kiss ribbon, brad, flower, scallop circle and circle punch, gamisol, color pencils

BLOODSHOT EYEBALLS 6x6 recipe page

These look scary! They are just peanut butter balls dipped in white chocolate, so if you have a favorite recipe you use for them for Christmas, you could use that also. I forgot to add on the recipe card to push the m&m's right in after you dip them, then chill. These would be great for a party! I just made a small amount to put on my Halloween cookie trays I give to people. They were so easy and quick to throw together!

  • Recipe:
  • Paper: Old Olive, white, Pebbles Patterned paper, pumpkin pie,
  • Stamps: Studio g
  • Ink: black stazon
  • Other: red marker, ribbon, buttons, clear adhesive pebbles {for eyes}

6" by 6" recipe page Witches Brew


This is a recipe my son used in grade school when he had to give a demonstration around Halloween time.{ I think my daughter may have used it too!} Then when he was in High school he dug it out to use for his speech class demonstration,also. For both he passed samples around. How could you not get a good grade when you bring food to class? I wonder if he will need it for pharmacy school too? I think not, he is probably concocting all kinds of things in his labs, but I doubt this! I want to keep this recipe card forever {he wrote it in 4th grade} and not too long ago I thought I lost it. Panic! After a few days it showed up, though. So here it is!


Recipe Page:
Paper: Eggplant, pumpkin pie, black, white, old olive
Ink: Black Stazon
Stamps: Spooky Halloween and a block stamp from Stampendous
Other: ribbon, brads, SU markers, square punch

Ready to go!


Here are my Halloween college care boxes for my kids all ready to go! I had so much fun putting them together. {I still send one to my daughter even though she graduated, it's becoming a tradition.} I took the photo before I packed everything up and addressed them. I think they'll have fun opening them up and remembering all the trick or treating we did when they were young. The neighborhood we lived in had a ton of kids and Halloween was always a big deal. I even let them make a Haunted House in our basement. This year I will be down town doing Trunk or Treat. Our church is handing out goodies from our car trunks. I think it will be fun!

Spider Tin

I want to show you what Holly had in my SU order bag. Isn't it cute? I have been seeing the spider mints all over Splitcoast, but haven't made any myself. The tin is full of chocolate, and I had a hard time not eating any until I took the photo! Thanks Holly!

WHAT?


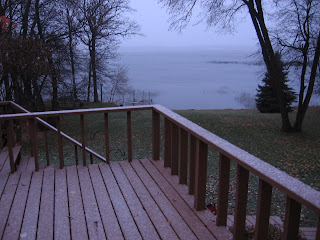
When we got up this morning and got ready for church it was really dark when I looked outside. But when we were ready to get our coats on I glanced out the window again and saw this!! WHAT???? I grabbed my camera and took a closer look.


Yes, it was what I thought, SNOW. I guess this is the beginning. Snow. Cold. Ice. It's here already. Winter!

Yesterday we went to Fargo shopping. Yes, I said Fargo, like the movie. I really don't think we sound like that "up here" as they portrayed in the movie. Well, maybe alittle. OK . So my dad and brothers name is Tosten and my uncle was Knute and my grandpa's name was Swen. But I don't really talk that way do I? Whatever. Well, anyway, they have a really great craft store at the Moorhead center Mall called K&K crafts, before you get to Fargo. So of course I had to stop! A gift certificate was burning a hole in my pocket so I needed to use it up. I just about fell over when I saw this: Justrite Stamps!!!! I have been wanting some forever and have been meaning to order some. I can't wait to try them out! I got the baking set, knowing I will really put it to use during the Holidays. What are Justrite stamps? Well here is the website where you can order them. http://justritestampers.com/ After I figure it all out and play with them, I'll let you know how I like them.

This afternoon I need to get my kids Halloween College care packages ready to send tomorrow. I'll post them tonite, so check back later!

I will DEFINITELY be posting later. Guess who just came to my door? Holly {SU deomstrator} with my new oval punch and.....something she made was inside my bag! I was so surprised! I LOVE it! Thankyou, Holly! I will post it later!

Some of my friends and I got together not to long ago and made a bunch of these cuttlebug Birthday cards. I only have a few left and decided I better get my bug going again this weekend and crank out a few more. Since we made these I have some new folders to play with,too. I only hope I can find some time! The weekends go by so fast. This month has just flown by and it's so hard to believe next week is already Halloween.
Recipe:

Paper: Black,white, real red

Other:ribbon, slit punch, brads, Cuttlebug Birthday folders


Christmas card

I've been playing with my square punches! I saw a card similar to this last Christmas on a blog somewhere. They had used last years holiday designer paper,though. I made mine with kiwi kiss and Holiday Treasures . I got to use my 3 favorite ribbons, kiwi kiss satin,riding hood red ,and chocolate chip. I used the SU retired set Sew Sensational with black stazon ink for the sentiment. I've been making lots of Christmas cards lately,but only one of each. Last year I mass produced the same one for everybody,but this year I think I'll just make 'em as I go!


Snowflake Coaster Ornaments

I ordered some round coasters awhile back, not sure what I would use them for. I saw them the other day and decided to make Christmas ornaments. I had also bought a container from my friend Jody at her rummage sale with wood pieces in it this summer. In one drawer I saw snowflakes and remembered what we had done with them to a card last Christmas at SU demonstrators Yvonne and JaNells workshop. We inked them up and put glitter on them and attached them to this card. So pretty! So I dug out my Holiday Treasures paper, traced the coasters, cut and glued the paper to the coasters, and sanded the edges. Then I inked up the snowflakes and put glitter on them. I was able to use my cropadile in the wooden snowflakes to put the crystal brads in. I have several coasters leftover so I need to come up with some more ideas to use them! Any ideas?

  • Recipe:

  • Paper: Holiday treasures, choc. chip.,riding hood red, old olive


  • Ink: riding hood red, old olive, pacific point


  • Other: round coasters, wooden snowflakes, tab punch, jumbo eyelets, riding hood red ribbon, crystal brads

More from the Workshop

Here are a few more things from the workshop the other nite at JaNell's and Yvonne's.{SU demonstrators} The bag is made with the Baskets and Blooms die. I don't have a Bigshot, but I do have a Cuttlebug. I'm ordering the Top Note die to try out and see how it works in my CB. I've read on other blogs that it works just fine, but I want to see for myself. The card was fun to make, you can't see from the photo, but we embossed the scallop with Iridescent Ice. I love that stuff! I also had fun using the Bigshot on the card below. We got to use the Upsa Daisy set and the Seasons of Friendship,too. On the Upsa Daisy card we used the rubber left over from mounting to sponge color for the background around the flowers. I loved the colors on both of these cards. We really had a nice evening stamping and learning new ideas and techniques, thanks again you guys!


SU Workshop

How cool is this set? JaNell and Yvonne {SU demonstrators} made it as a hostess gift for me at their workshop. I belong to their monthly club and last nite was my turn to host. I don't know if you can tell by the picture, but the box in the back held the 3 cards and open-end envelopes. I just love it! I don't have the directions for the box, though. I love the Urban Garden paper. They also gave each of us the owl treat bag made with the top note die. I have seen several on different blogs and think it is so cute. I will post the cards we made tomorrow, so check back! Isn't he sweet? I love how they did the eyes!

Halloween Treat Bags


A long time ago, I bought some dollar stamps at Michaels. I've been having fun making Halloween bag toppers with them. My friend Judy just bought a ton of them and was asking how I store mine. Right now I have them in a basket because I haven't had time to put them in clear CD cases. But that's the plan! I found that the dollar stamps seem to stamp better when I use stazon ink. It just seems they hold the ink better and stamp clear. When I use other inks they're blurry. Does anyone else have this problem? I suppose at a dollar, they're not great quality, but so far I'm very pleased if I use the stazon with them.

Some of my friends and I went to an SU workshop last nite at JaNell's and Yvonne's. It was ALOT of fun and the stuff we made was so neat! I will try to post some of it later today, so check back. They had some great ideas I can't wait to post. Thanks so much for a fun nite!


  • Recipe:
  • Paper: pumpkin pie, black, white, patterned paper
  • Ink: black stazon
  • Other: ribbon, brads, eyelets, cropadile
  • Stamps:Studio g


6" by 6" recipe page Almond Bundt cake


I just can't wait to slice into this cake. The almond flavor is awesome. {Sometimes I add a little more almond flavoring because I LOVE it.} I have taken it quite often to potlucks and I always get requests for the recipe. Yum!


  • Recipe Page:

  • Paper: Apricot Appeal, white, certainly celery, designer paper

  • Other: brads, word window punch, flower punch, prisma flowers

Great Day!


We had a great time yesterday celebrating our sons graduation from college. {he's in pharmacy school right now} As you can see in the photo, Brent's mom and our daughter came also. {Her boyfriend took the picture of us.} We went out for brunch and my faves were the incredible Blueberry fritter french toast and wild rice sausage. The day went by way too fast and I hated to see them leave! CONGRATULATIONS!!!!!!

Christmas Gift Tags


Here are a few tags I made for Christmas with the new Holiday Treasures designer paper. I really get into making tags, so prepare yourself for more future posts. I just have way to much fun making them. In fact, sometimes I have trouble using them I like them so much! Today is going to be a fun day for me. Both my kids will be home and we will be celebrating our sons graduation from college, finally! He graduated last spring and this is the first opportunity we've had to all get together. He's in Pharmacy school now and came home for fall break for a few days. I can't tell you how good it has been to have him home! I'm off to church and then out to celebrate!
  • Recipe:
  • Paper: Holiday Treasures, riding hood red, old olive, vanilla, white
  • Stamps: Punch Pals, Best Yet
  • Ink: black stazon, riding hood red, old olive
  • Other: scallop circle punch, circle punches, tab punch,old olive ribbon, riding hood red ribbon, crystal brads, eyelets, word window punch, blender pen

Old Olive or Kiwi Kiss?


So which green do you like the best? Old Olive or Kiwi Kiss? I can't decide. Old Olive has always been my favorite, but I do like Kiwi Kiss more and more. And what about last years in color, Wild Wasabi? I loved that too, and I have some stashed away. That's the problem with SU in colors. They are fun while new, but you never want to use them up when they retire cuz you can't buy them anymore! I look at the Wild Wasabi and think, "I better not use it, I have to save it for a worthy project." But then I NEVER use it, I still have some Cranberry Crisp I horded from 2 years ago. Oh well, I guess I need to get over it! I made this Christmas card with Real Red and added Old Olive with some of last years designer Christmas paper. I'm glad Old Olive isn't an in color! You can't see from the picture very well, but I put crystal effects over the bulbs on the trees.
Today we will spend most of the day outside getting our fall chores done. There is raking to do and we have to take our boat lift and dock in which is a major production. First the guys put waders on and push the lift in. No easy task as it settles in the sand over the summer. They float it up with old rubber black tire tubes. Then they hook up winches to the truck and pull out the dock. But wait, we are still not done! Then the pieces have to be moved and stored. The paddle boat has to be stored. (the boat is already in} The lawn furniture stored. The gutters cleaned that are full of leaves. The pump has to be pulled in from the lake from the sprinkling system. The pipes have to be blown out so it doesn't freeze. Finally after all that, we will be ready for snow. And cold. And ice. You know it will be here. It's just a matter of time. There is no hiding. {except for snowbirds like Diane who will spend her winter down south} I can remember many Halloweens where the kids and I trudged through snow and ice to trick or treat! Hopefully we will get it all done today so no stamping for me. One great thing thinking about winter though, are all the long cozy days and nights of stamping that are ahead for me!


  • Recipe:


  • Paper: real red, old olive, white, designer paper


  • Ink: Old Olive, real red


  • Stamps: Punch Pals, Stampendous


  • Other: old olive ribbon,word window punch, crystal effects

Halloween Center Piece

This is another tin I bought at Target in the dollar spot. Isn't it amazing what one can find there? Treasures that's for sure. Stuff you just gotta have. Stuff that just finds its way into your cart. I found some cool stuff to put in our son's Halloween care box (for college finals}I have been working on. He loves The Office show on NBC Thursday nights, but gets little time to watch it as he is usually busy that nite. So last Christmas we gave him all the seasons on DVD. Over Christmas break when he had his wisdom teeth out, I sat and watched with him and then I got HOOKED, too. We laughed until it hurts. Anyway, at the Target dollar spot they had all sorts of fun Office show stuff like notepads, pens, magnets, squeeze heads for stress relief, all sorts of things. Just perfect for sticking in his box for a laugh. Even though our daughter is out of college, I'll send her a box too. When I get them done, I'll post a picture.

So back to the Halloween tin! My friend Jody gave me a few pixie stix she had left over from a project and let me use her Batty for You stamp set the other day, so I stuck them in this tin with one of the little pumpkins I made by gluing ten tab punches together. I have it setting out as a decoration, and it makes me smile everytime I look at it! Look what you can do with a dollar.


  • Recipe:

  • Paper: black, yellow, white, pumpkin pie, eggplant, old olive

  • Ink: Black Stazon

  • Stamps: Batty for You

  • Other: scallop circle punch, circle punches, old olive ribbon for the stem of the pumpkin

6" by 6" recipe page Halloween Finger Cookies


These were fun to make and taste great, too. My friend Jody says she makes them and adds green food coloring to the dough for the fingers. I think that would look even more spooky! They have almond flavoring in them which I love, but you could just use vanilla instead if you prefer. I would definitely make them again, in fact I have a potluck at work coming up and I think I will bring these! I am up early today, even on my day off{still coughing, can't sleep, and uncomfortable with my cold} and now I am glad I am as I look outside. The sunrise is beautiful over the lake. It's so calm and peaceful and the colors are reflecting on the water. Maybe I should get up early more often!
Recipe Page:
Stamps: Spooky Halloween, Studio g
Ink: Black Stazon
Paper: Pumpkin pie, white, black, green
Other: ribbon, buttons, scallop edge punch,SU clip


October Card Club

Last night we had our monthly card club {of about 20 members .} We take turns bringing all the supplies for a card and pay one dollar for each card we make to the people who brought the card to share. It's always fun to see what people come up with. I LOVED all of them! The first card is a window card made by Sharon. It's a great fall card! I hadn't made a window card before so it was a lot of fun. We all enjoyed coloring the barn with daubers and ink, something else I don't do very often, either. I will definitely make some window cards after trying this. The second card was made by AC and I love punches so I really got into this! The pumpkins were made with the large and small oval punches, then sponged on the edges. She had some cool Debbie Mumm fall paper and you could choose between Halloween and Thanksgiving. I really liked the clip and ribbon, too! The third card was made by Nancy and I loved the colors on it! The straw flowers added a lot of texture and I think its neat the way the stems hang out from the bottom. They are such tiny, cute flowers and a great idea for fall. She had a spectrum ink pad for the sentiment, another thing I don't have that was fun to use.

The fourth card was made by Peg. It was a Halloween double pocket card. She had done so much work for this card! Not only had she scored it all, but she had made a ton of fun things with her cricut for us to choose. You could really be creative and no two cards turned out the same! Everyone had fun picking out the cute card candy! I got stazon all over mine so I grabbed another pumpkin to cover it up. {thanks Peg} The last card was made by the other Sharon. I was excited to see the new in-color tangerine tango and what the Haiku paper looked like. I really like it and plan to order some after the Holidays. I have some spring projects I would love to use it for. Anyway the card is not exactly the way she designed it, as I had some more trouble with the stazon getting all over the place! She had some twill tape to stamp a sentiment on and of course I messed it up. I loved the prima flower! She had other choices of colors for the card,too. She also had pink and green, but I really wanted to try the tangerine tango. It was another fun night with good friends and good cards!

Halloween Gift Bag

This is a bag I made to give with a hostess gift. I used the tutorial on Splitcoast for the black paper scalloped medallion in the middle of the bag. It was pretty easy, considering I have a hard time with the scallop edge punch normally. I can never seem to get the scallops where I want them. For this though, you can use the measurements on the punch itself to make it even. You use a 2 3/4" square. It's fun! Check out the tutorial here: http://splitcoaststampers.com/resources/tutorials/scallopedgemedallion

I will be back with more posts later this morning so check back!


Recipe:


  • Paper: pumpkin pie, black, eggplant, old olive, patterned paper


  • Ink: Black stazon


  • Stamps: Batty for You


  • Other: Old Olive ribbon, scallop edge punch and circle punches


Cricut Water bottle toppers


I need more water bottle toppers for Halloween so I decided to use some of my cricut card candy stash for these. I have a hard time using them they're so cute, but I can always make some more one of these days.


Recipe:

  • Paper: black, orange, yellow, eggplant

  • Ink: black stazon

  • Stamps: Spooky Halloween by stampendous
  • Other: brads, rectangle nestabilities,circle and scalloped circle punch

6" by 6" recipe page Baked Spagetti


I have a cold and stayed home from work yesterday. I feel some better so I plan to go in today. I'm hoping it goes away soon as I have too much going on this week to be sick! Starting tonite! It's card club night! This is the monthly group that gets together and makes 5 cards. We all take turns bringing all the materials for a card and pay one dollar per card to make. Tonite is AC's turn and she has an awesome card I can't wait to post. I will post all the cards we make tomorrow. So be sure to check back and see what everyone came up with this month! I served this Baked Spaghetti to my "guinea pigs" when we stamped the other day. I am always trying new recipes out on people. Everyone liked this one, so I promised I would post it. I have not run it through the recipe builder yet to calculate the calories but I did find it on the boards on the WW website. Someone had listed it as 6 servings {for 5 things} WW people will know what I mean by "things." It is always good to check out the nutrition facts for yourself. I have a ton of recipes to run through the ww recipe builder but I know I won't have time until after the Holidays. Then I will go back to all the recipes I posted here and include the nutrition in the ones I haven't so far.{ Except Paula Deene's. I don't even want to know! All that butter! But I love her and all her recipes, and try to save them for special occasions.} Here's the recipe page:
  • Paper: Kiwi kiss, riding hood red, white,Holiday Treasures
  • Ink: kiwi kiss, riding hood red, lilac, barely banana
  • Other: kiwi kiss satin ribbon, button
  • Stamps: Voila

I have no idea why my photos won't enlarge! I can't figure that out. Does anyone know what I need to do? Sometimes they do enlarge and sometimes they don't! It's so frustrating and I'm new to all this blogging so it takes me forever to figure stuff out. Anyway as you can't enlarge the recipe page, I typed the recipe below. Have a great day!

Baked Spaghetti
8 oz. cooked spaghetti
1/4 c. eggbeaters
1/4 c. Parmesan cheese
1/2 tsp. salt
Mix and put in a greased 9x13 pan.
1/2 lb. hamburger
1/2 c. chopped onion
Brown and put on top of noodles.
1 10 oz. jar Ragu spaghetti sauce.
Put on top of hamburger and top with
1 c. 2% mozzarella cheese. Top that with
8 slices pepperoni. Bake at 350 for 30 min.


Awesome Gift


This is the recipe book my daughter made for me for my Birthday last year. I can't even tell you how much I LOVE it! She did an awesome job on it and the recipes are great! She loves to scrapbook, which I should do, and used to, until I started making cards. That's why I started the 6x6 recipe pages, in hopes of making a recipe book. I do have quite a few done now,too. Here are a few pages from inside her book.


Target Halloween Tin

I picked up a few of these tin pails at Target the other day in the dollar spot. I just tied some kiwi kiss ribbon around it and added a scalloped circle tag. I used the Spooky Halloween stamp set with black Stazon ink. Then I filled it with pretzel rods dipped in chocolate and rolled in Halloween sprinkles. I set this out when I served lunch the other day when my friends came to stamp. I think it would make a great gift for a neighbor or friend, too. You could wrap the rods with clear plastic wrap and tie them with ribbon before putting them in the pail. A fun and simple gift!

Aren't these a hoot?


Owls are popping up everywhere on Splitcoast and blogs all over. They all seem alittle bit different, some using different punches and colors. These are our version from our stamping day! Using punches is one of my favorite things to do and I use at least one punch in almost every card I make. I saw a cute owl on http://cherrystamper.blogspot.com/ you may want to check out, too. I got some fun things from my friends yesterday! Diane gave me a bag of the new Halloween m&m's that have the kiwi kiss color in them, Judy gave me the cool pumpkin with candy inside that she got at Old Liberty, and Jody made me a test tube candy and box. If you would like to make the test tube, here's Jody's blog: http://discoverdecipherdigest.blogspot.com/ These would be so fun for a party and you could fill them with all kinds of things. Thanks so much you guys and thanks for coming over, as I had a great day!